Breaking Down the Process: AI-Driven Action Sequence
This project started with a simple idea: create a cinematic, grounded action sequence—set in real-world Chicago—featuring a fully AI-generated version of myself, a custom-designed mech suit, and a large-scale creature.
What made it interesting wasn’t just generating shots—it was building a pipeline that allowed for consistency across characters, environments, and motion.
Character Creation
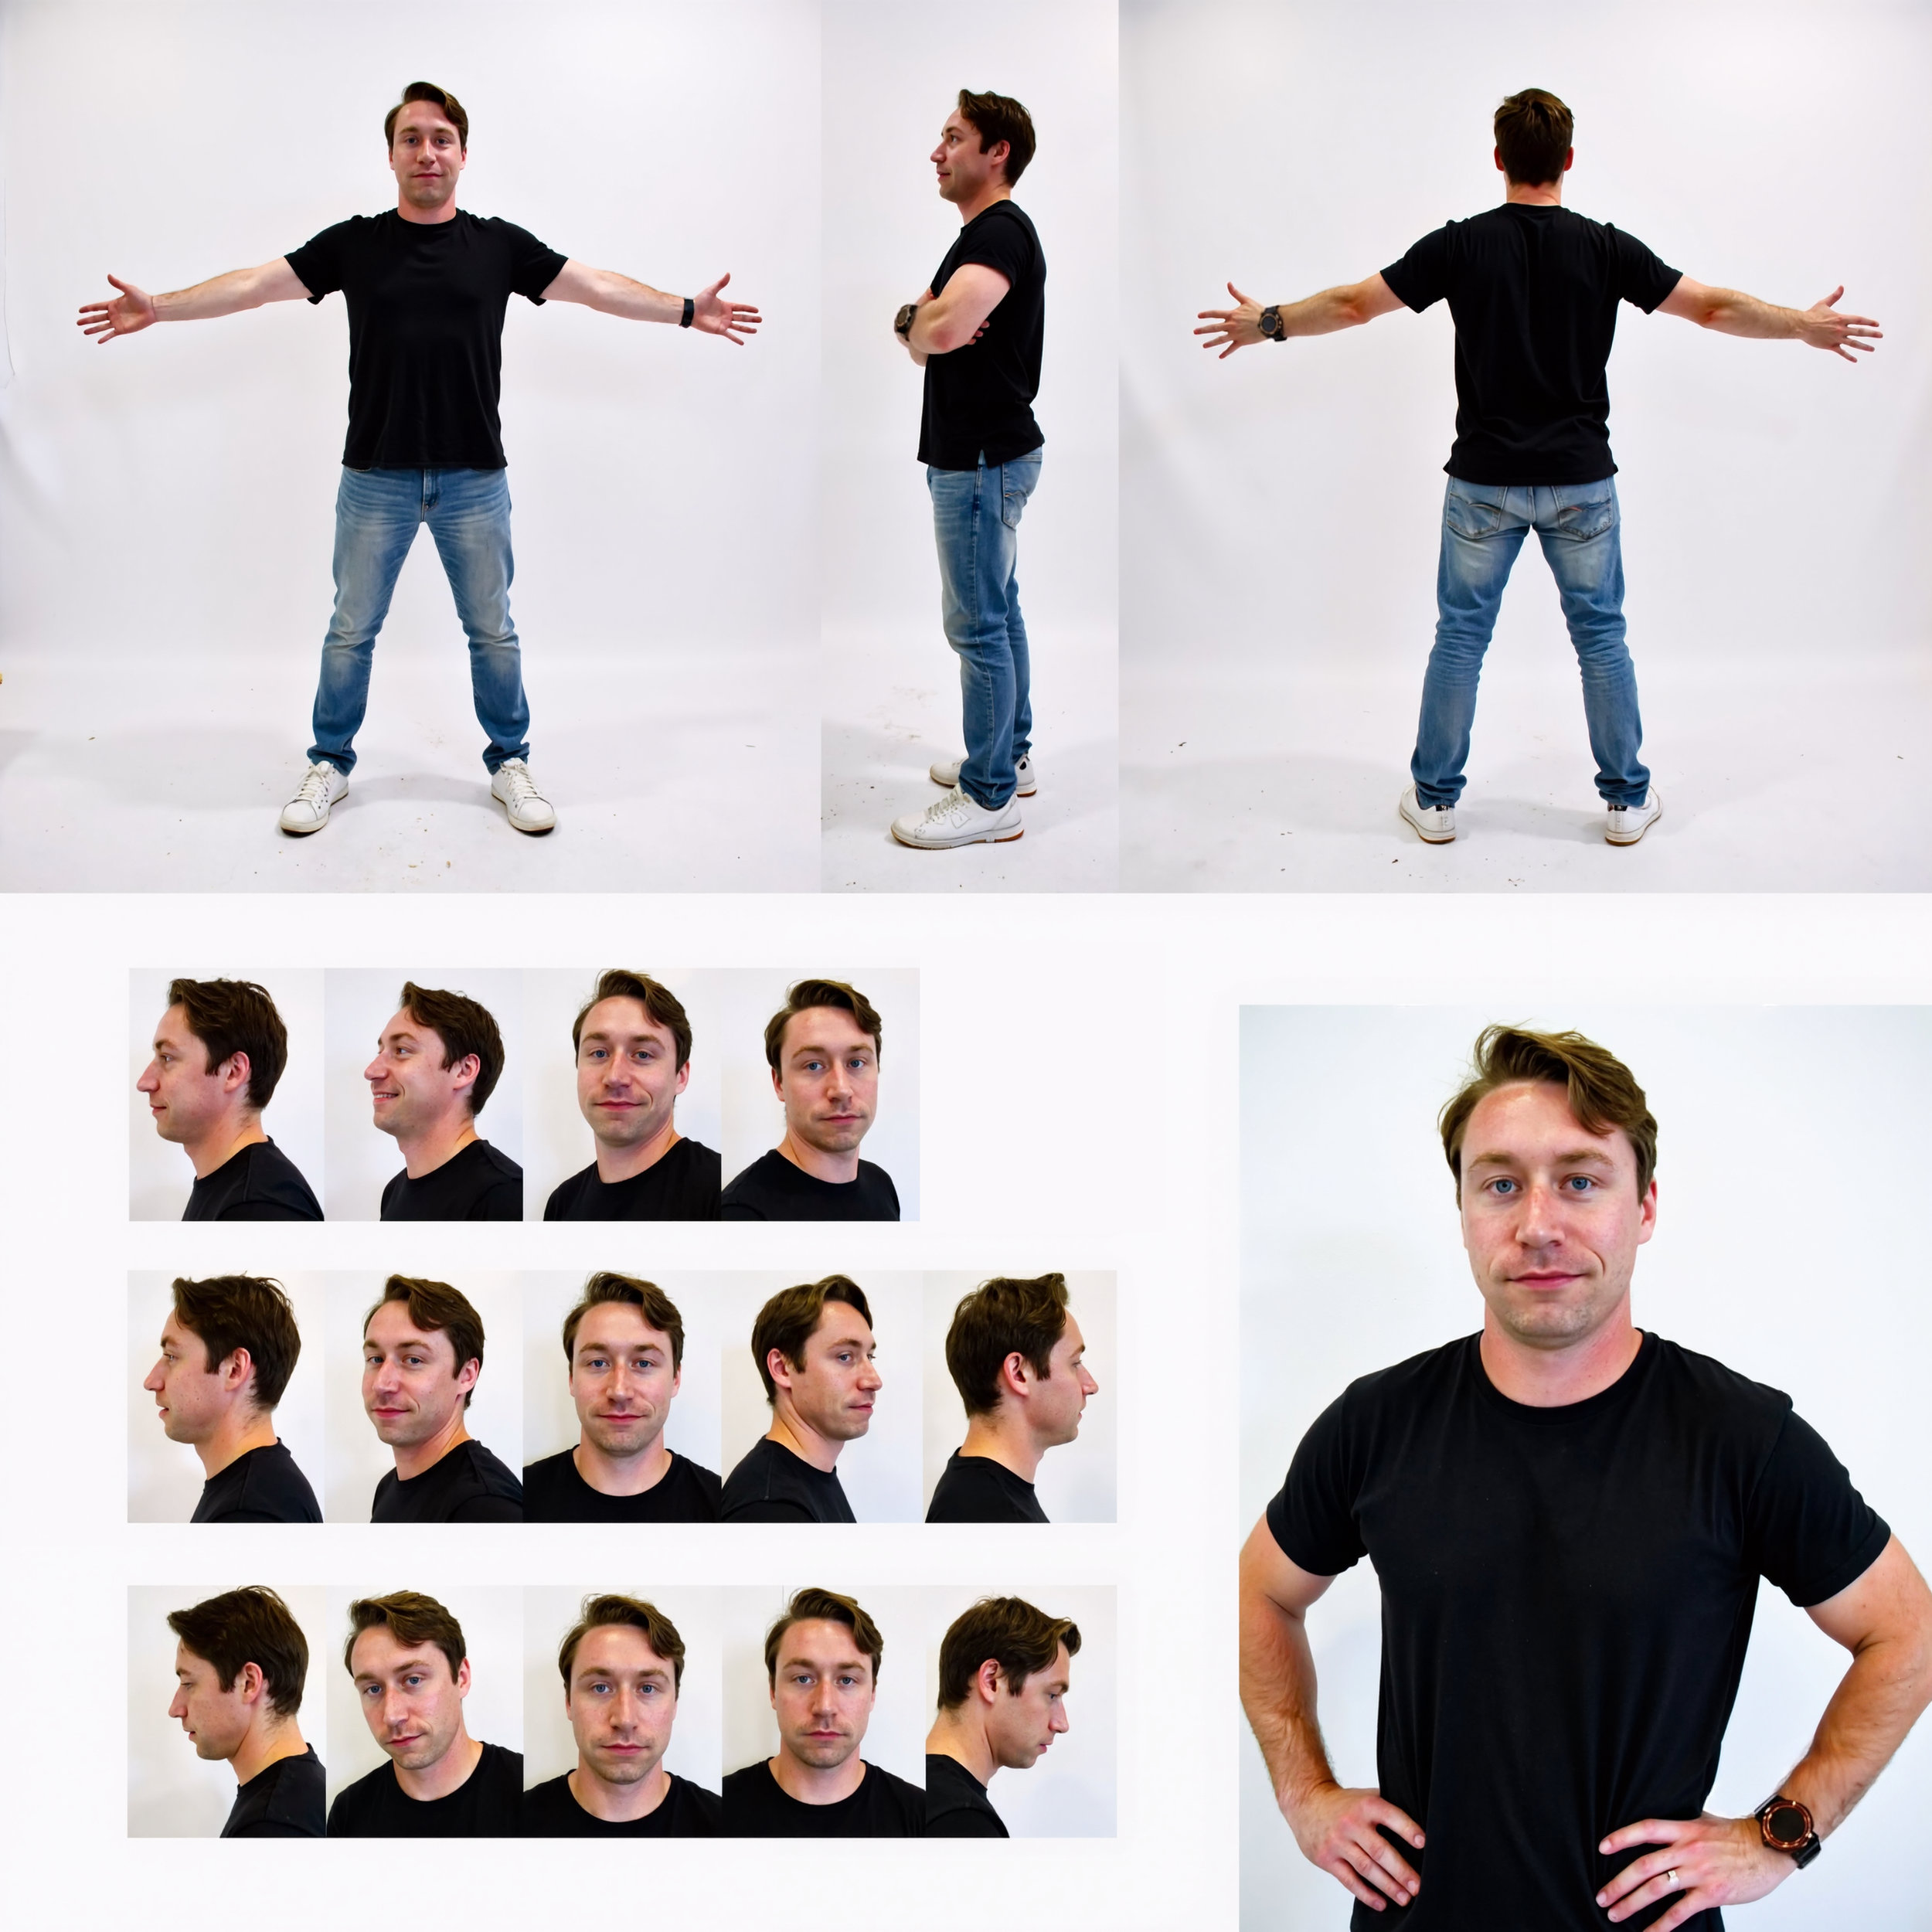
1. Digital Double (Myself)
To create a consistent version of myself across shots, I trained a FLUX LoRa on a curated dataset of my face and body.
Using a custom ComfyUI setup, I generated controlled outputs:
Full body (multiple angles)
Head turnarounds
Expression variations
This gave me a reliable “actor” that could be dropped into any shot while maintaining identity and proportions.
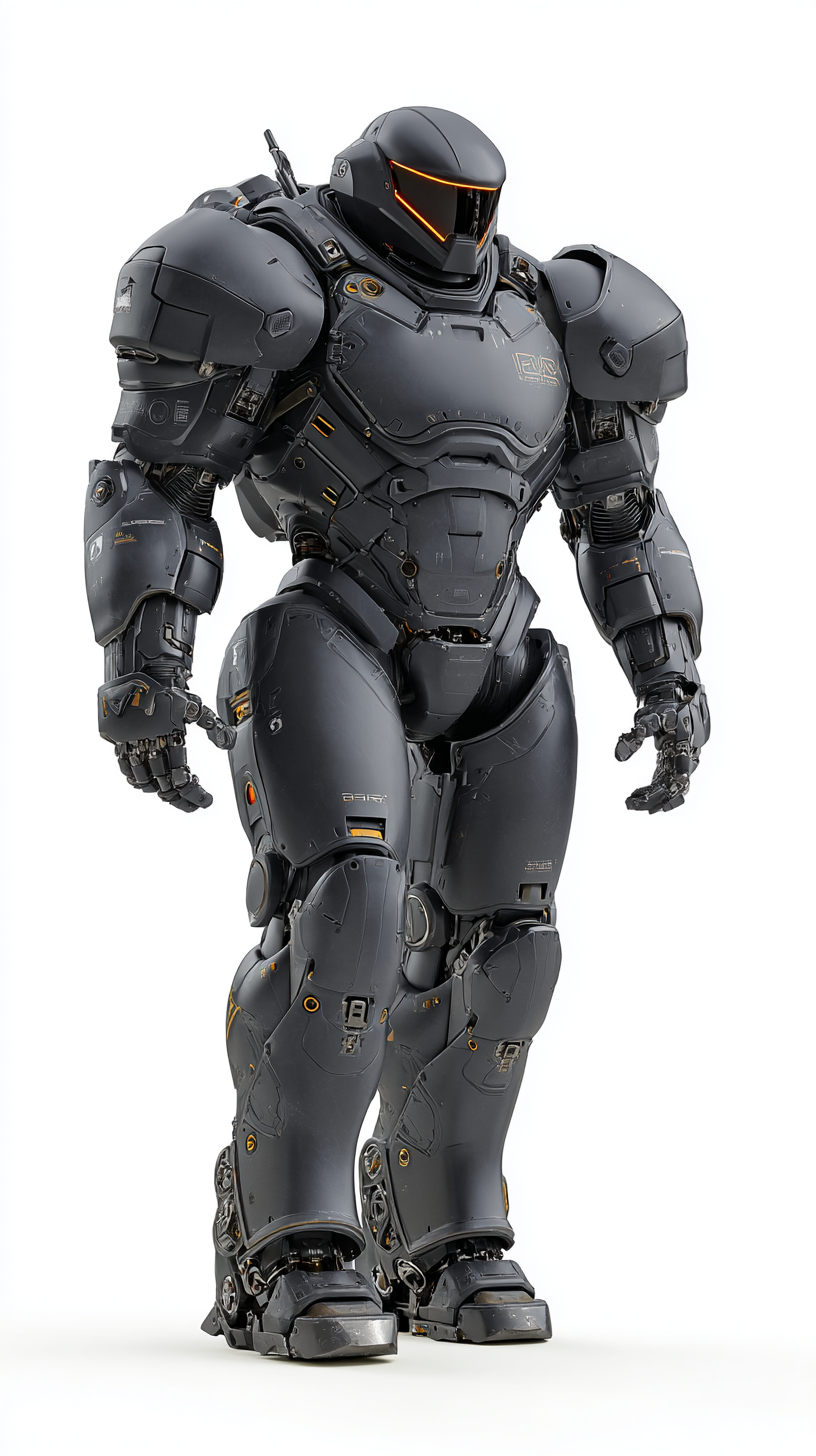
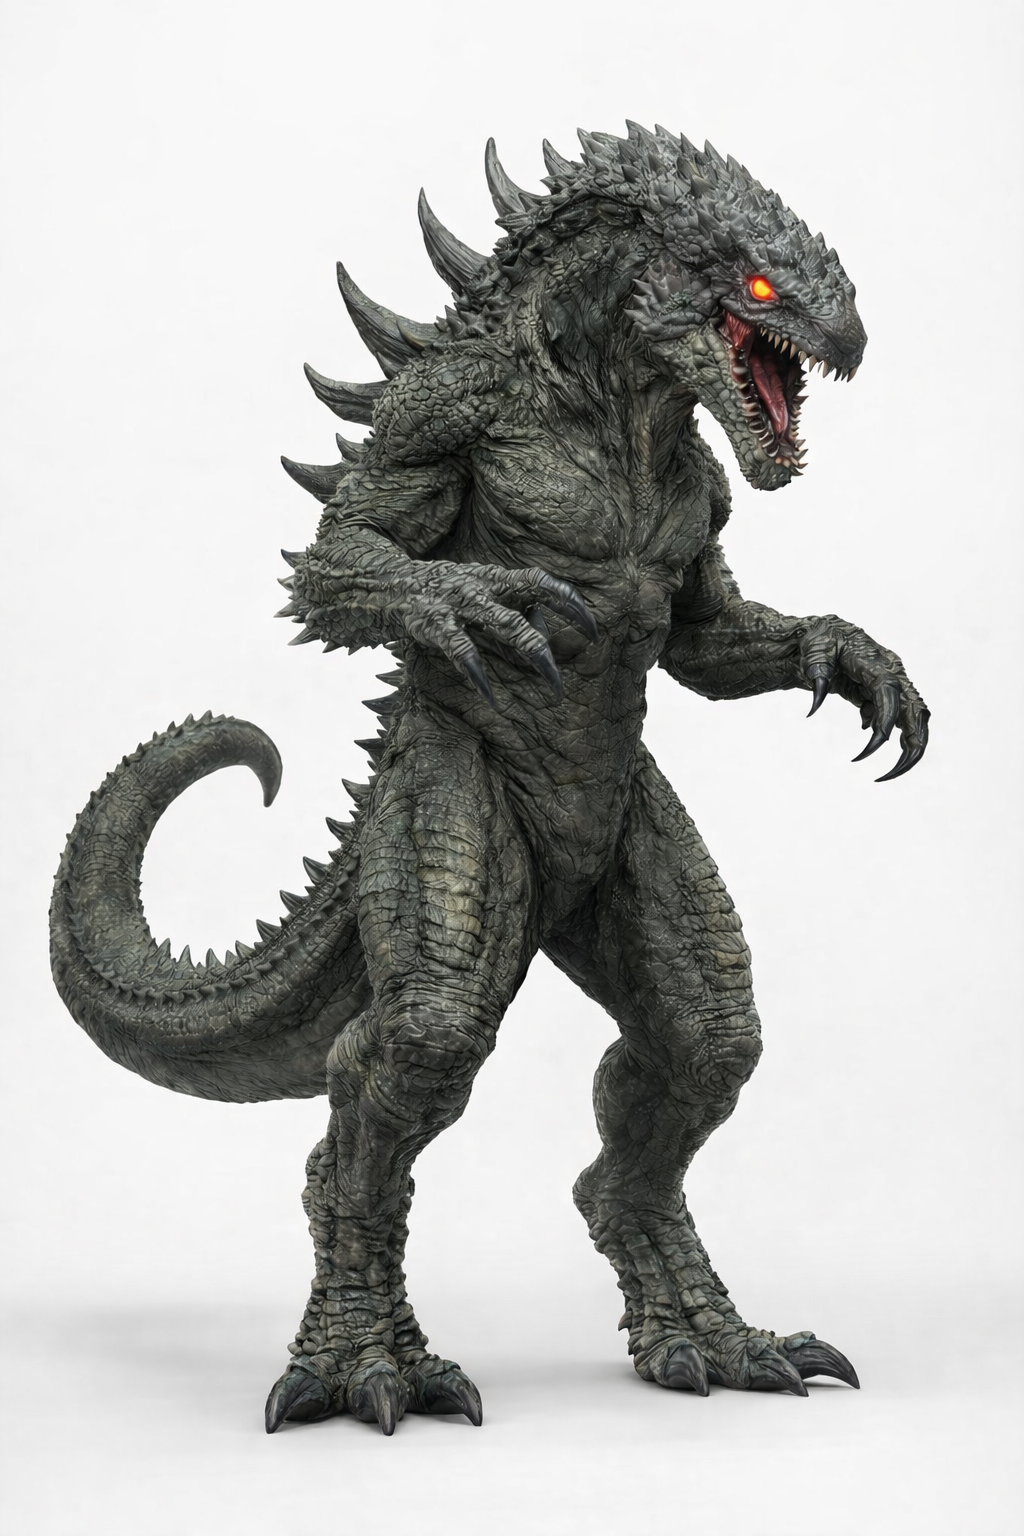
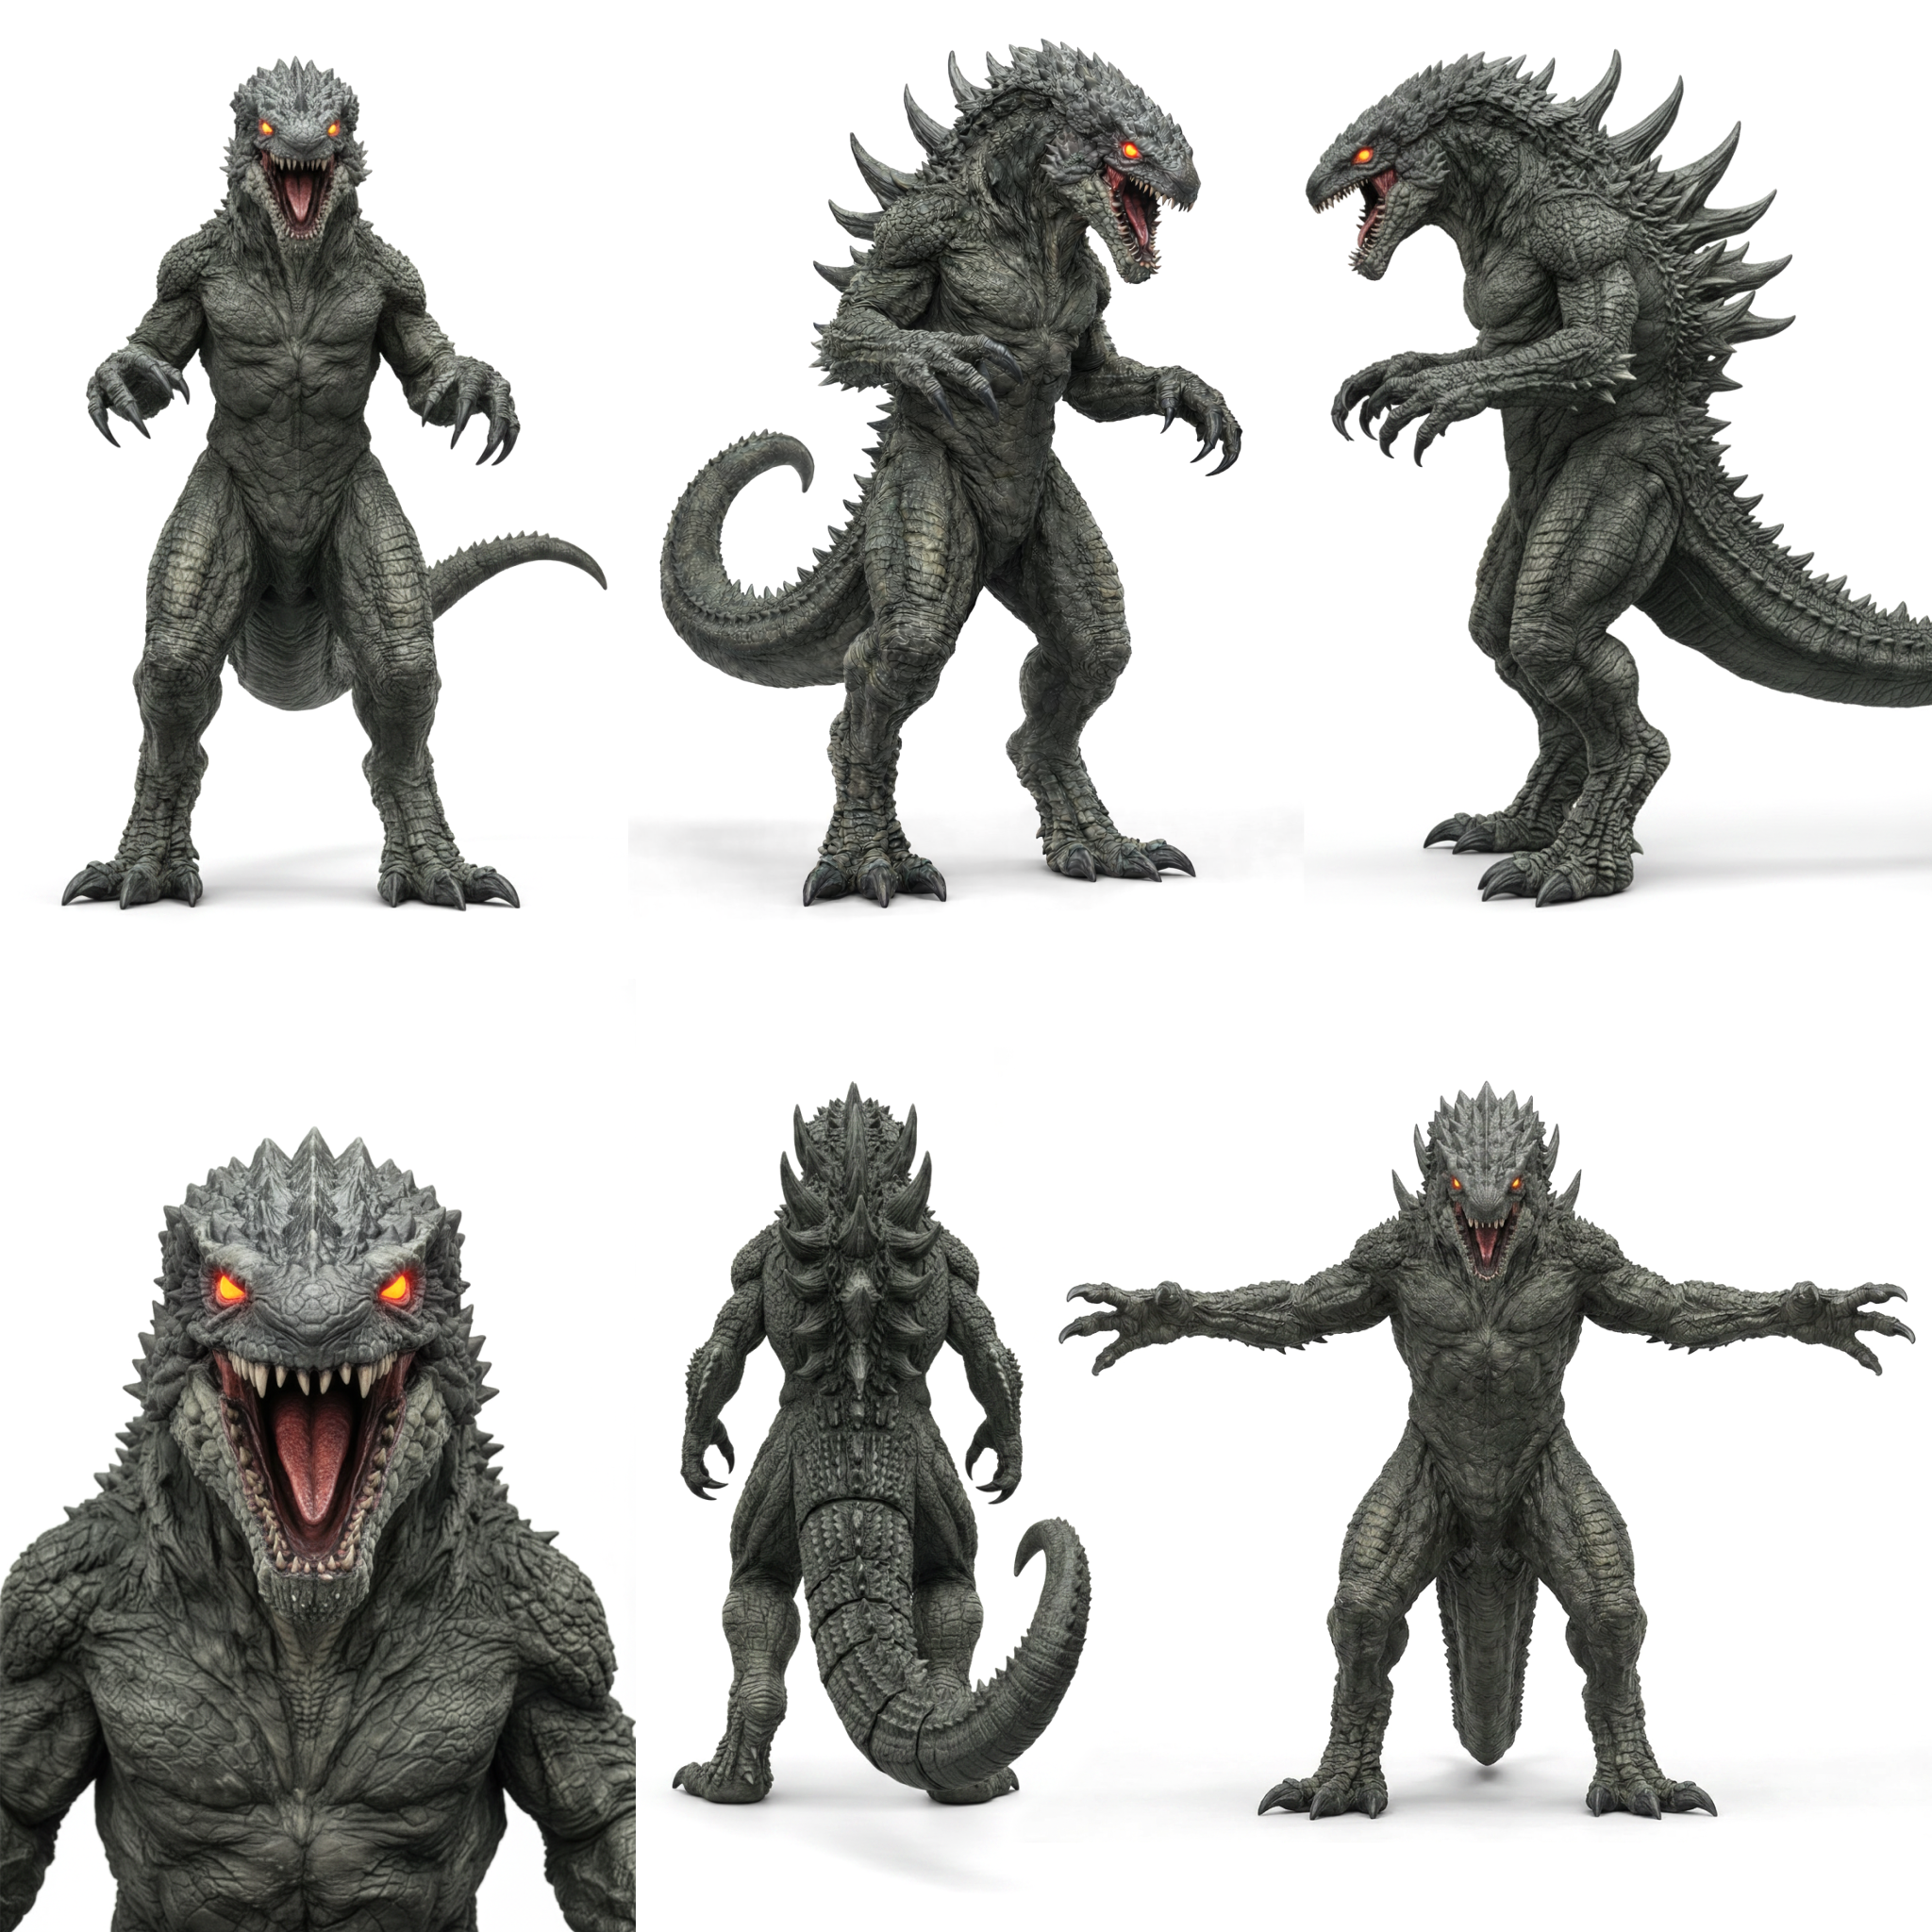
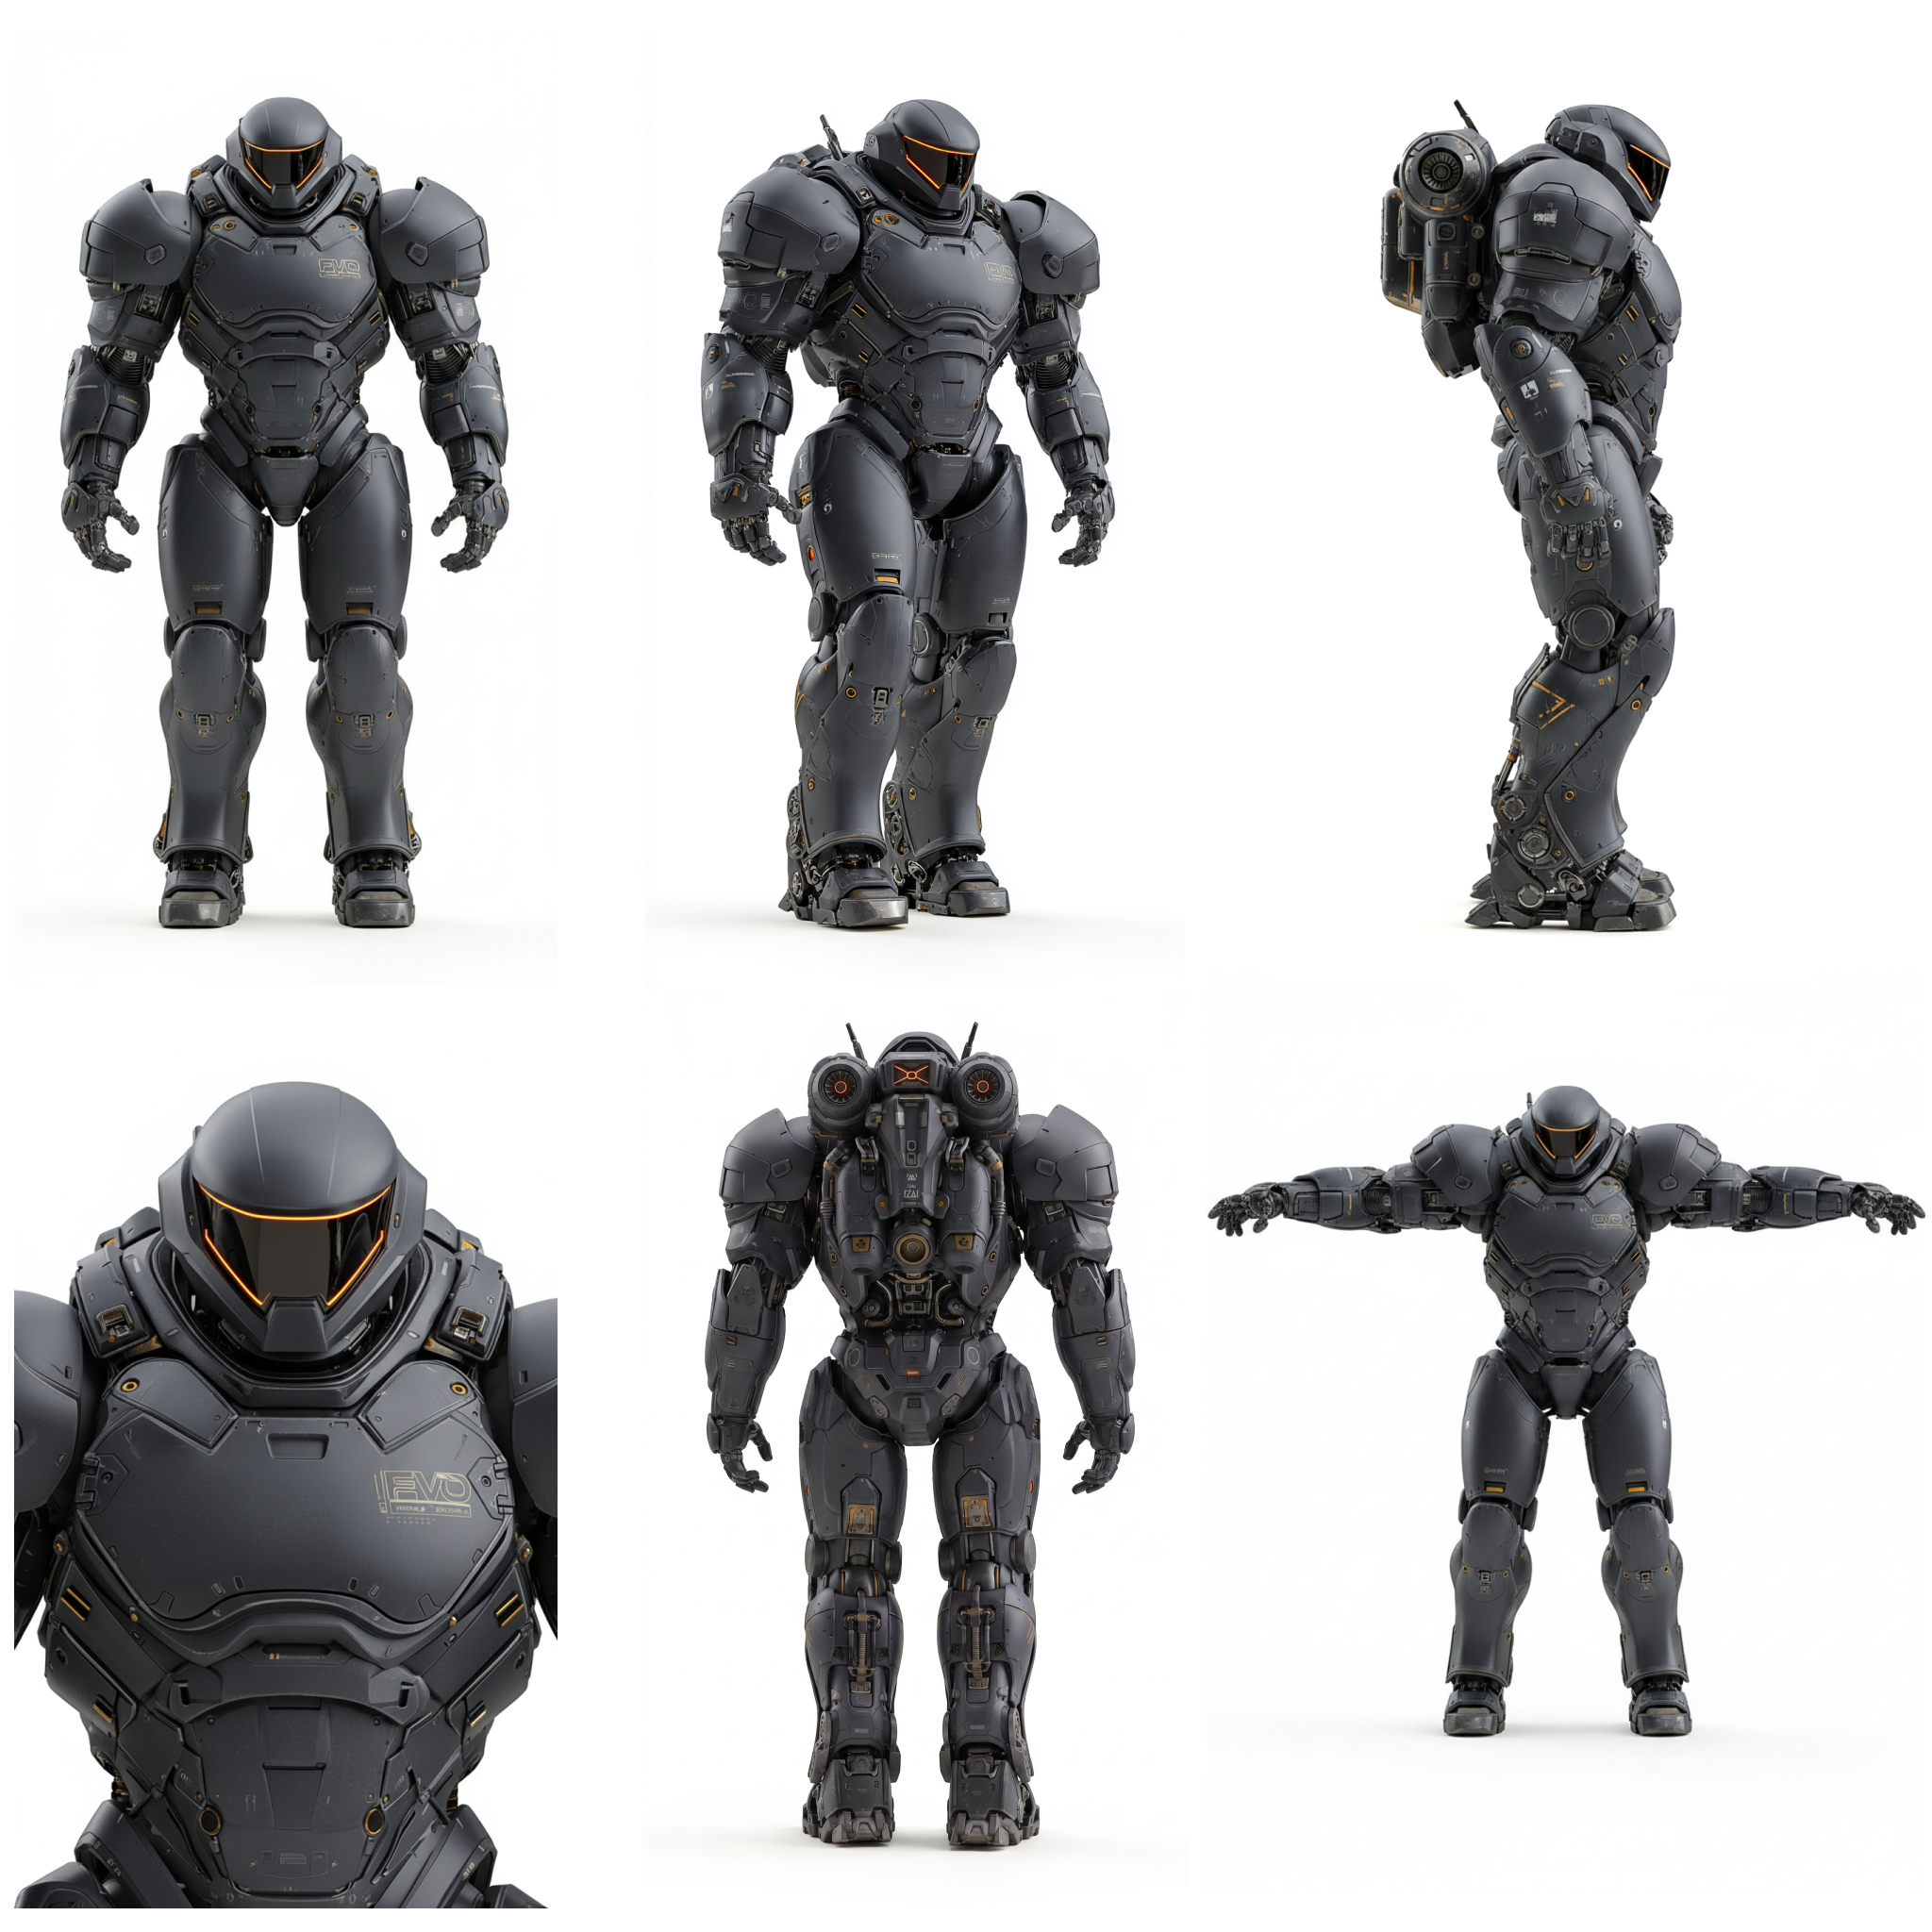
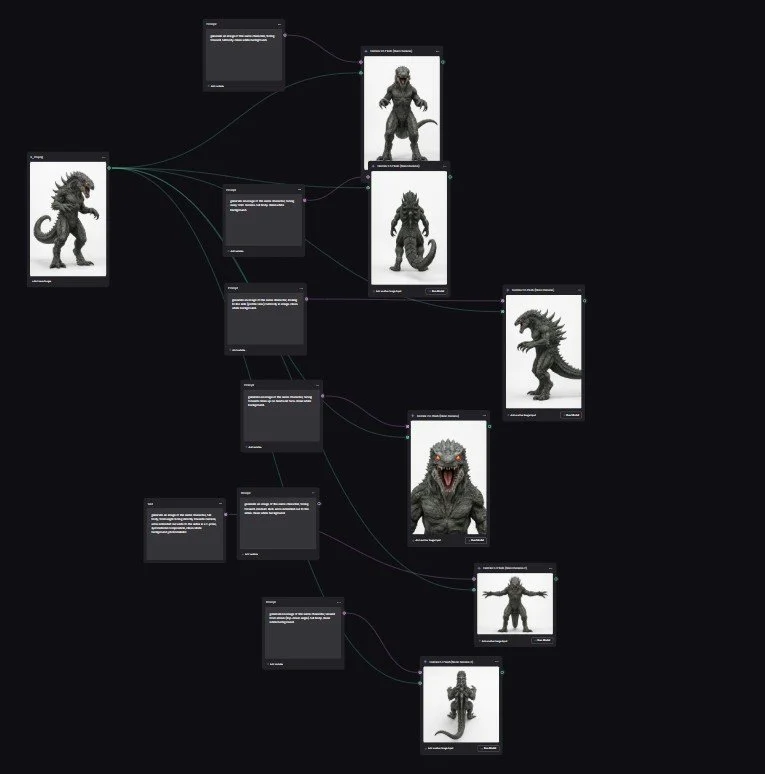
2. Mech Suit + Creature Design
The mech suit and creature were developed in MidJourney through heavy iteration—pushing for:
Strong silhouette readability
Mechanical realism (for the suit)
Anatomical weight and texture (for the creature)
Once I landed on designs I liked, I ran those images through a custom NanoBanana + Wavy workflow to generate:
Multiple angles
Pose variations
Structural consistency
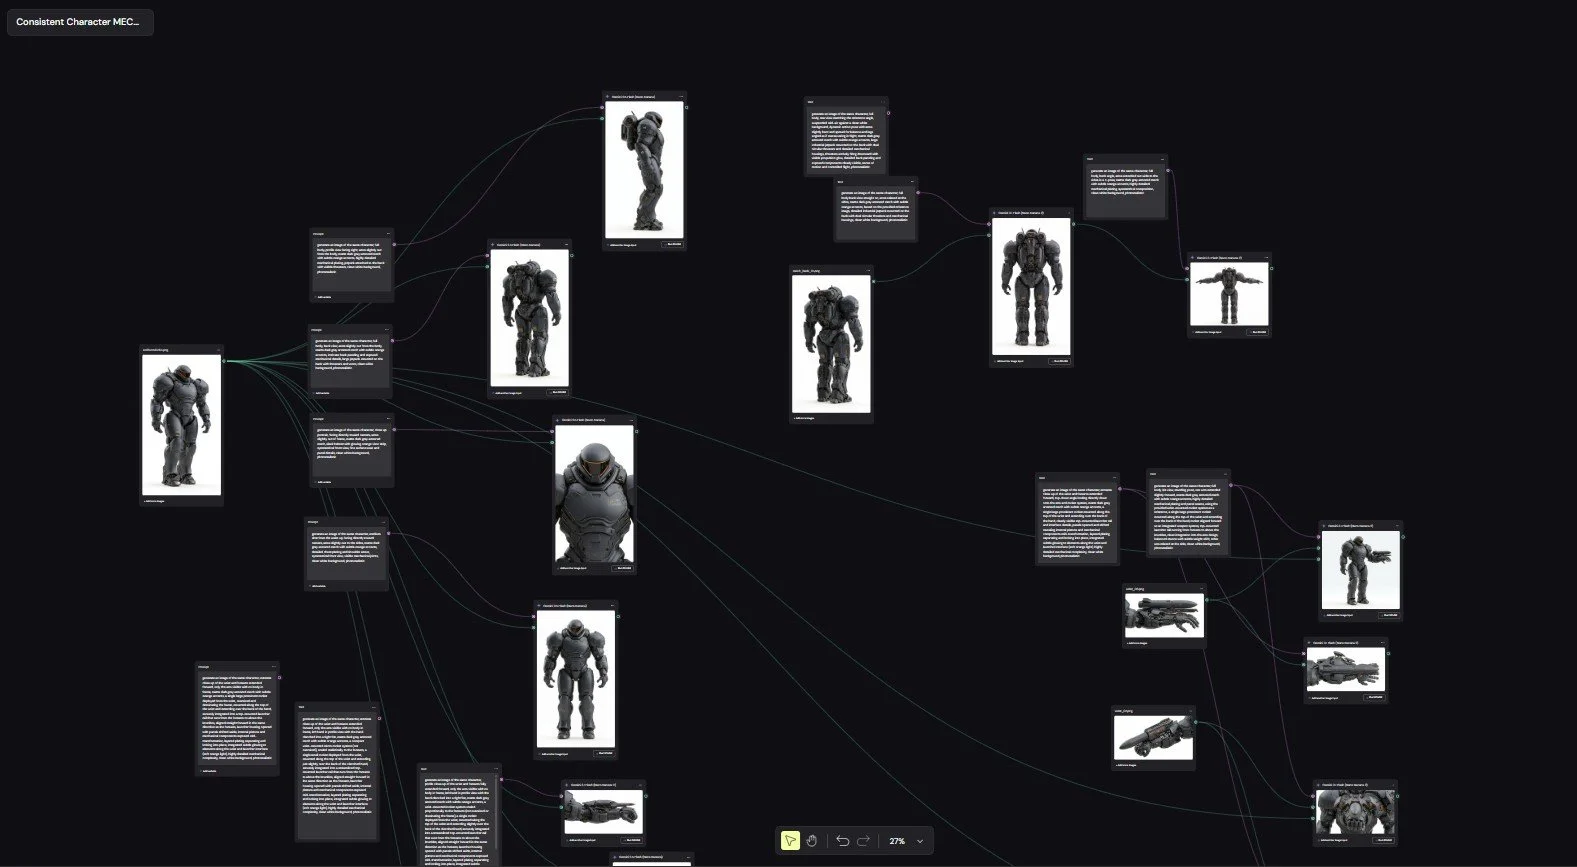
From there, I assembled everything into 2048x2048 character sheets, which became the backbone of the entire pipeline.
These sheets were included in every Seedance 2.0 prompt to maintain:
Design consistency
Proportions
Material detail
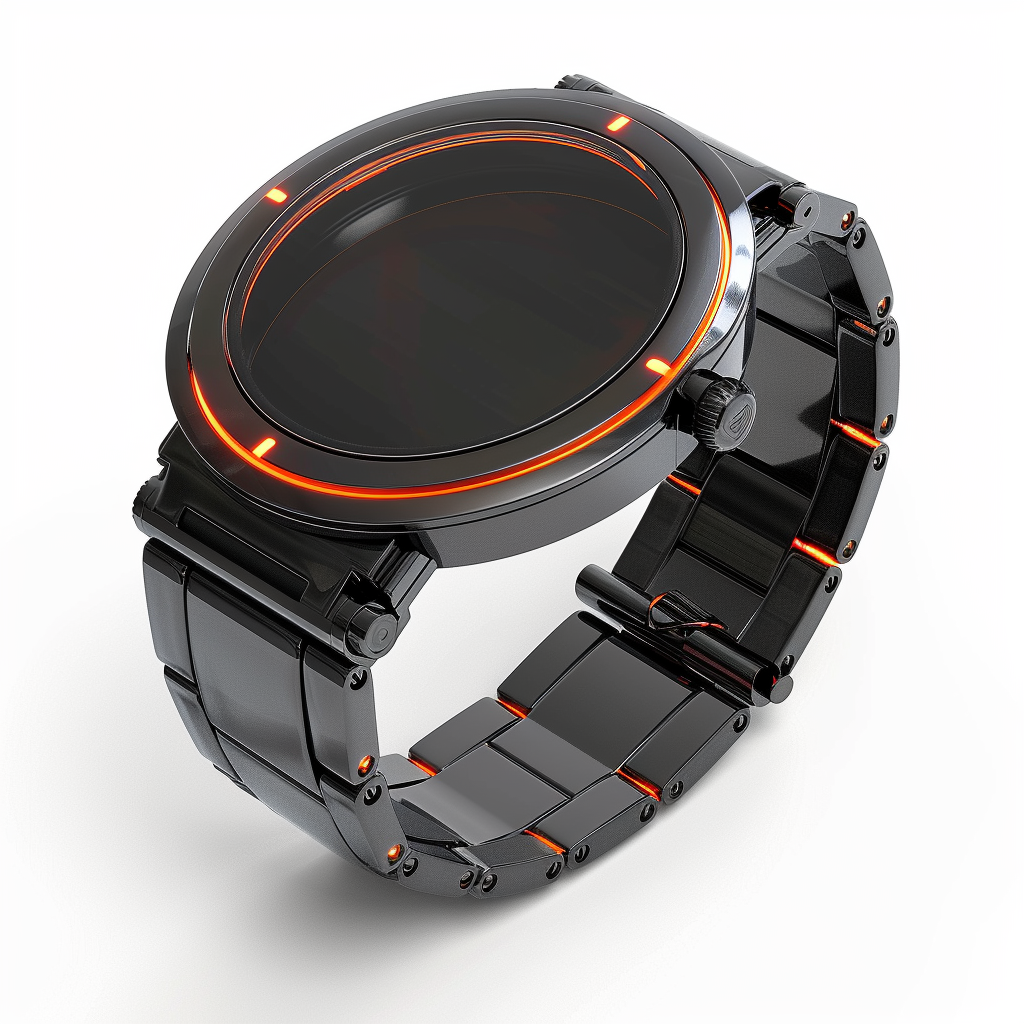
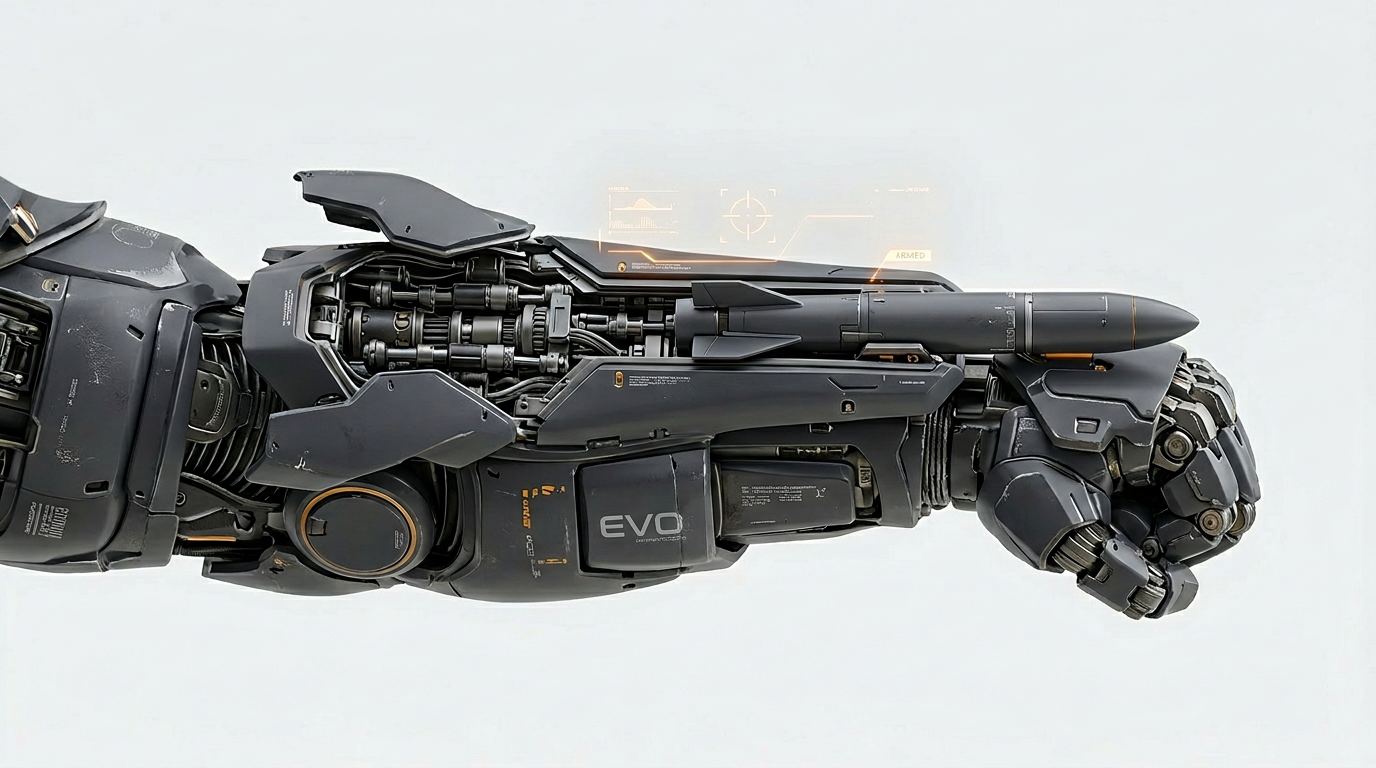
Smaller elements like the watch transformation trigger and wrist-mounted weapon system were treated as their own assets—designed and referenced independently to ensure clarity during close-ups.
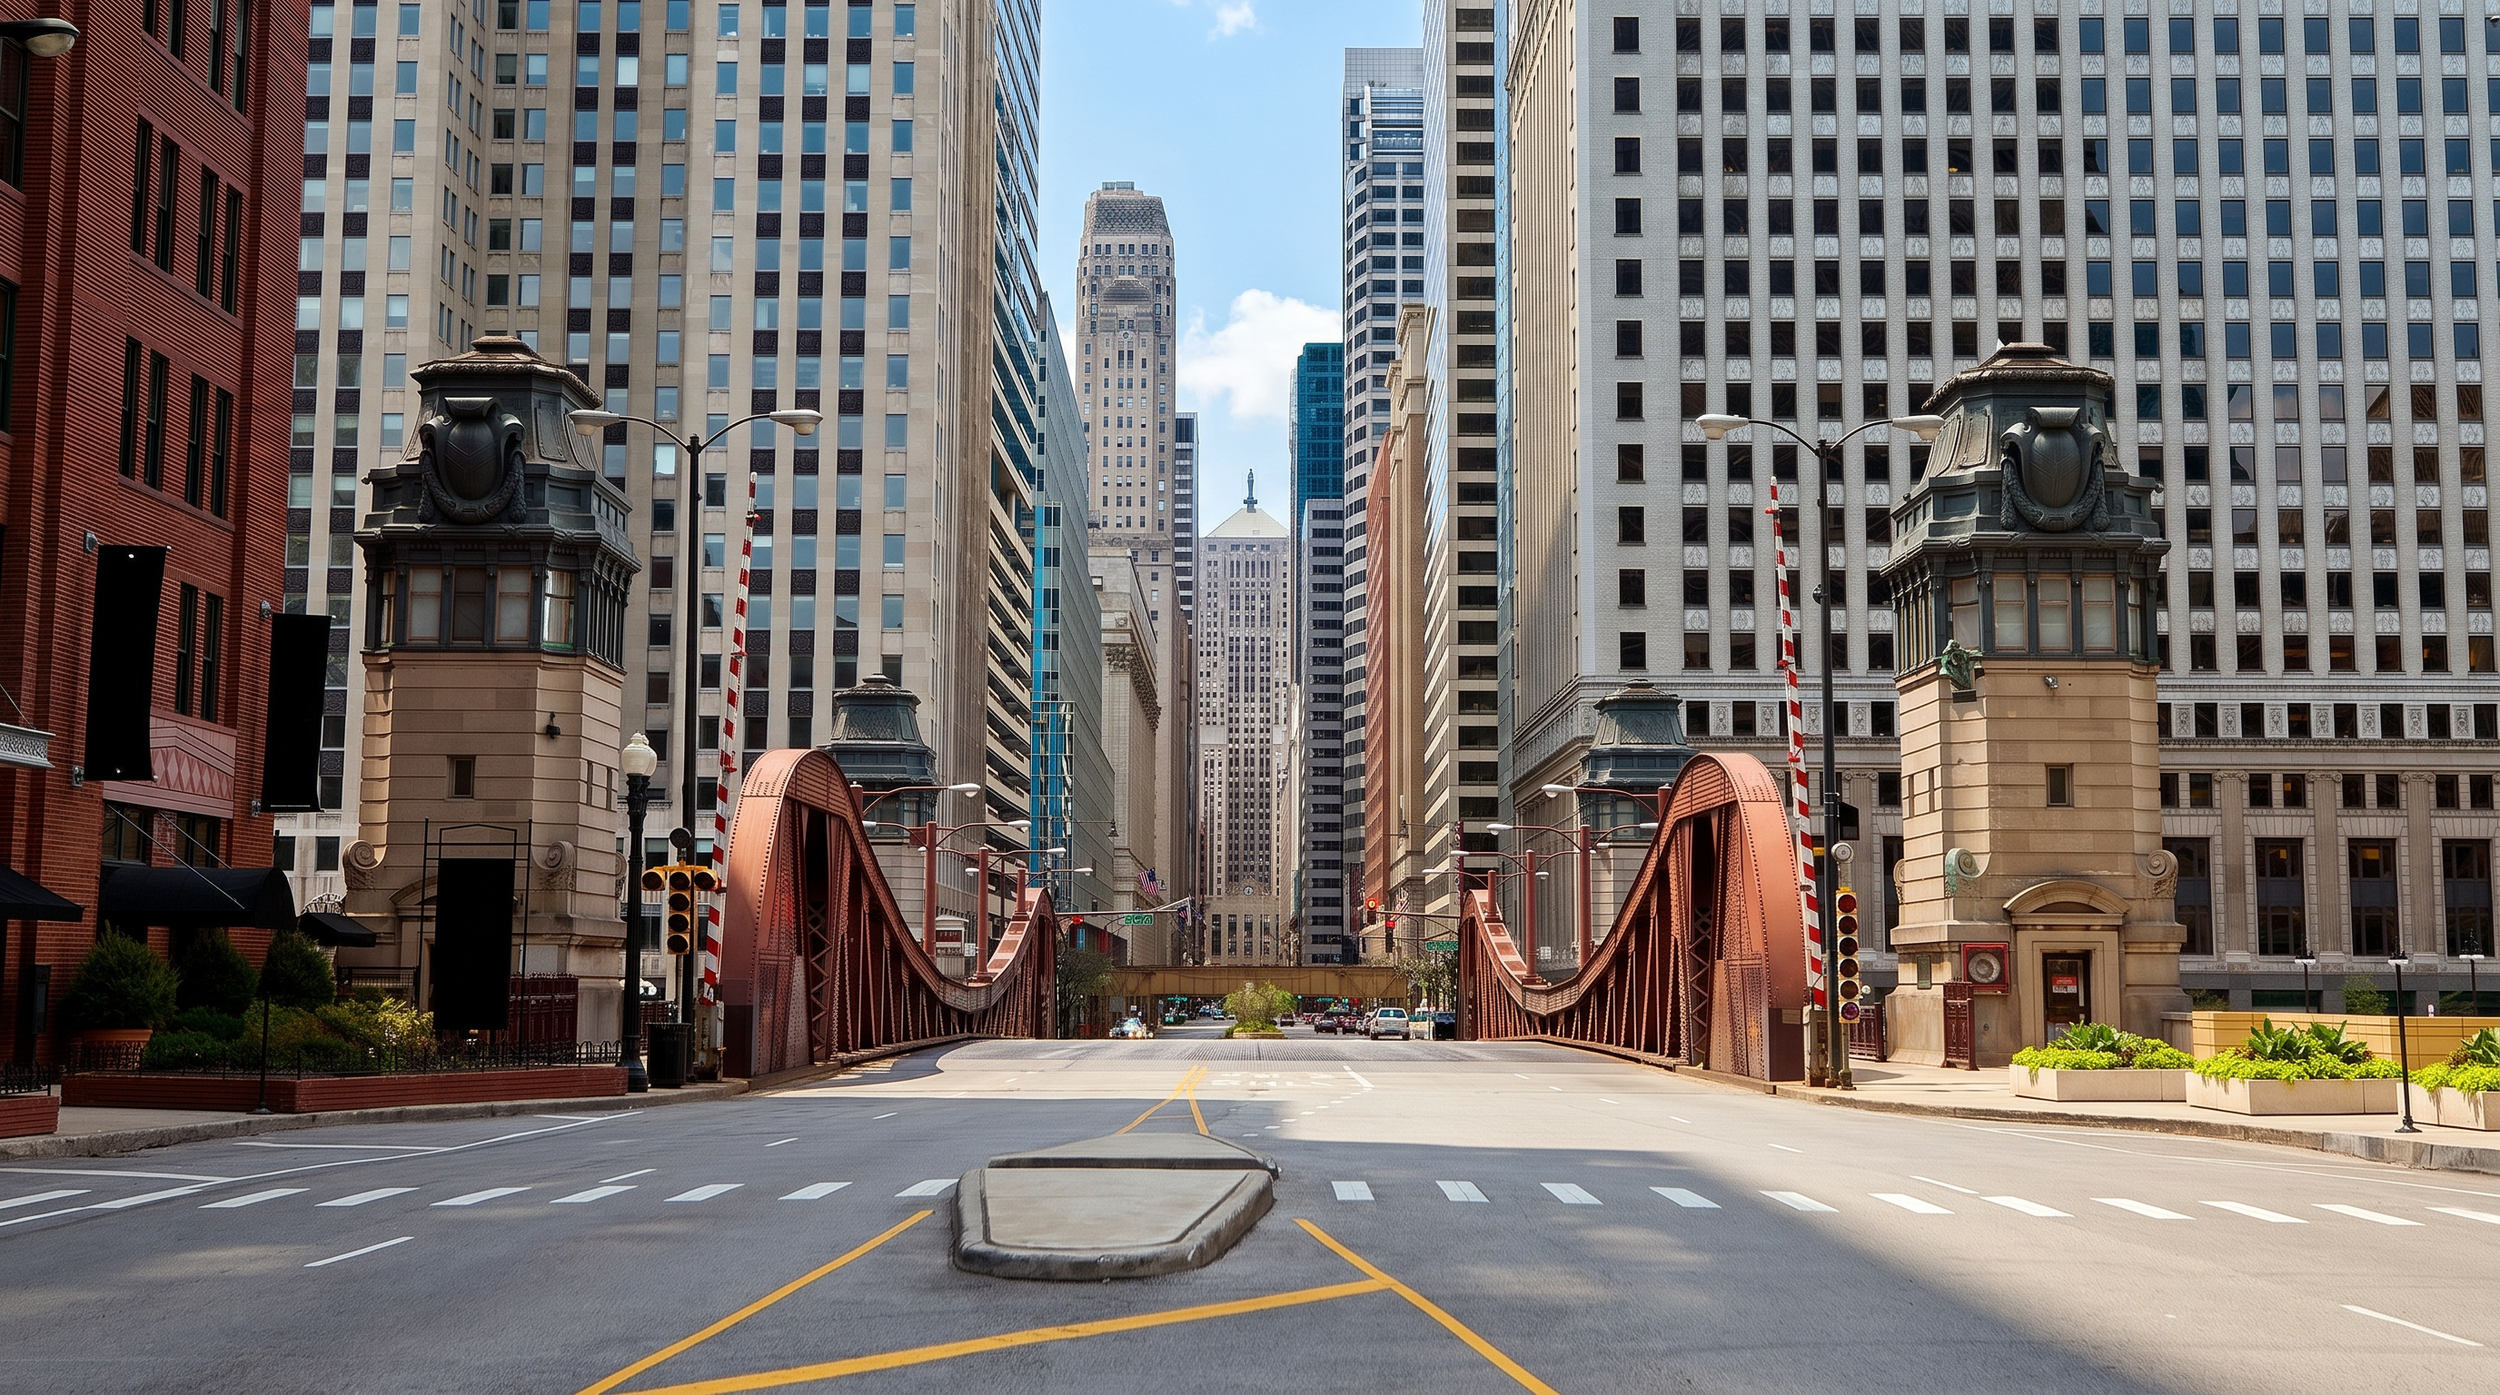
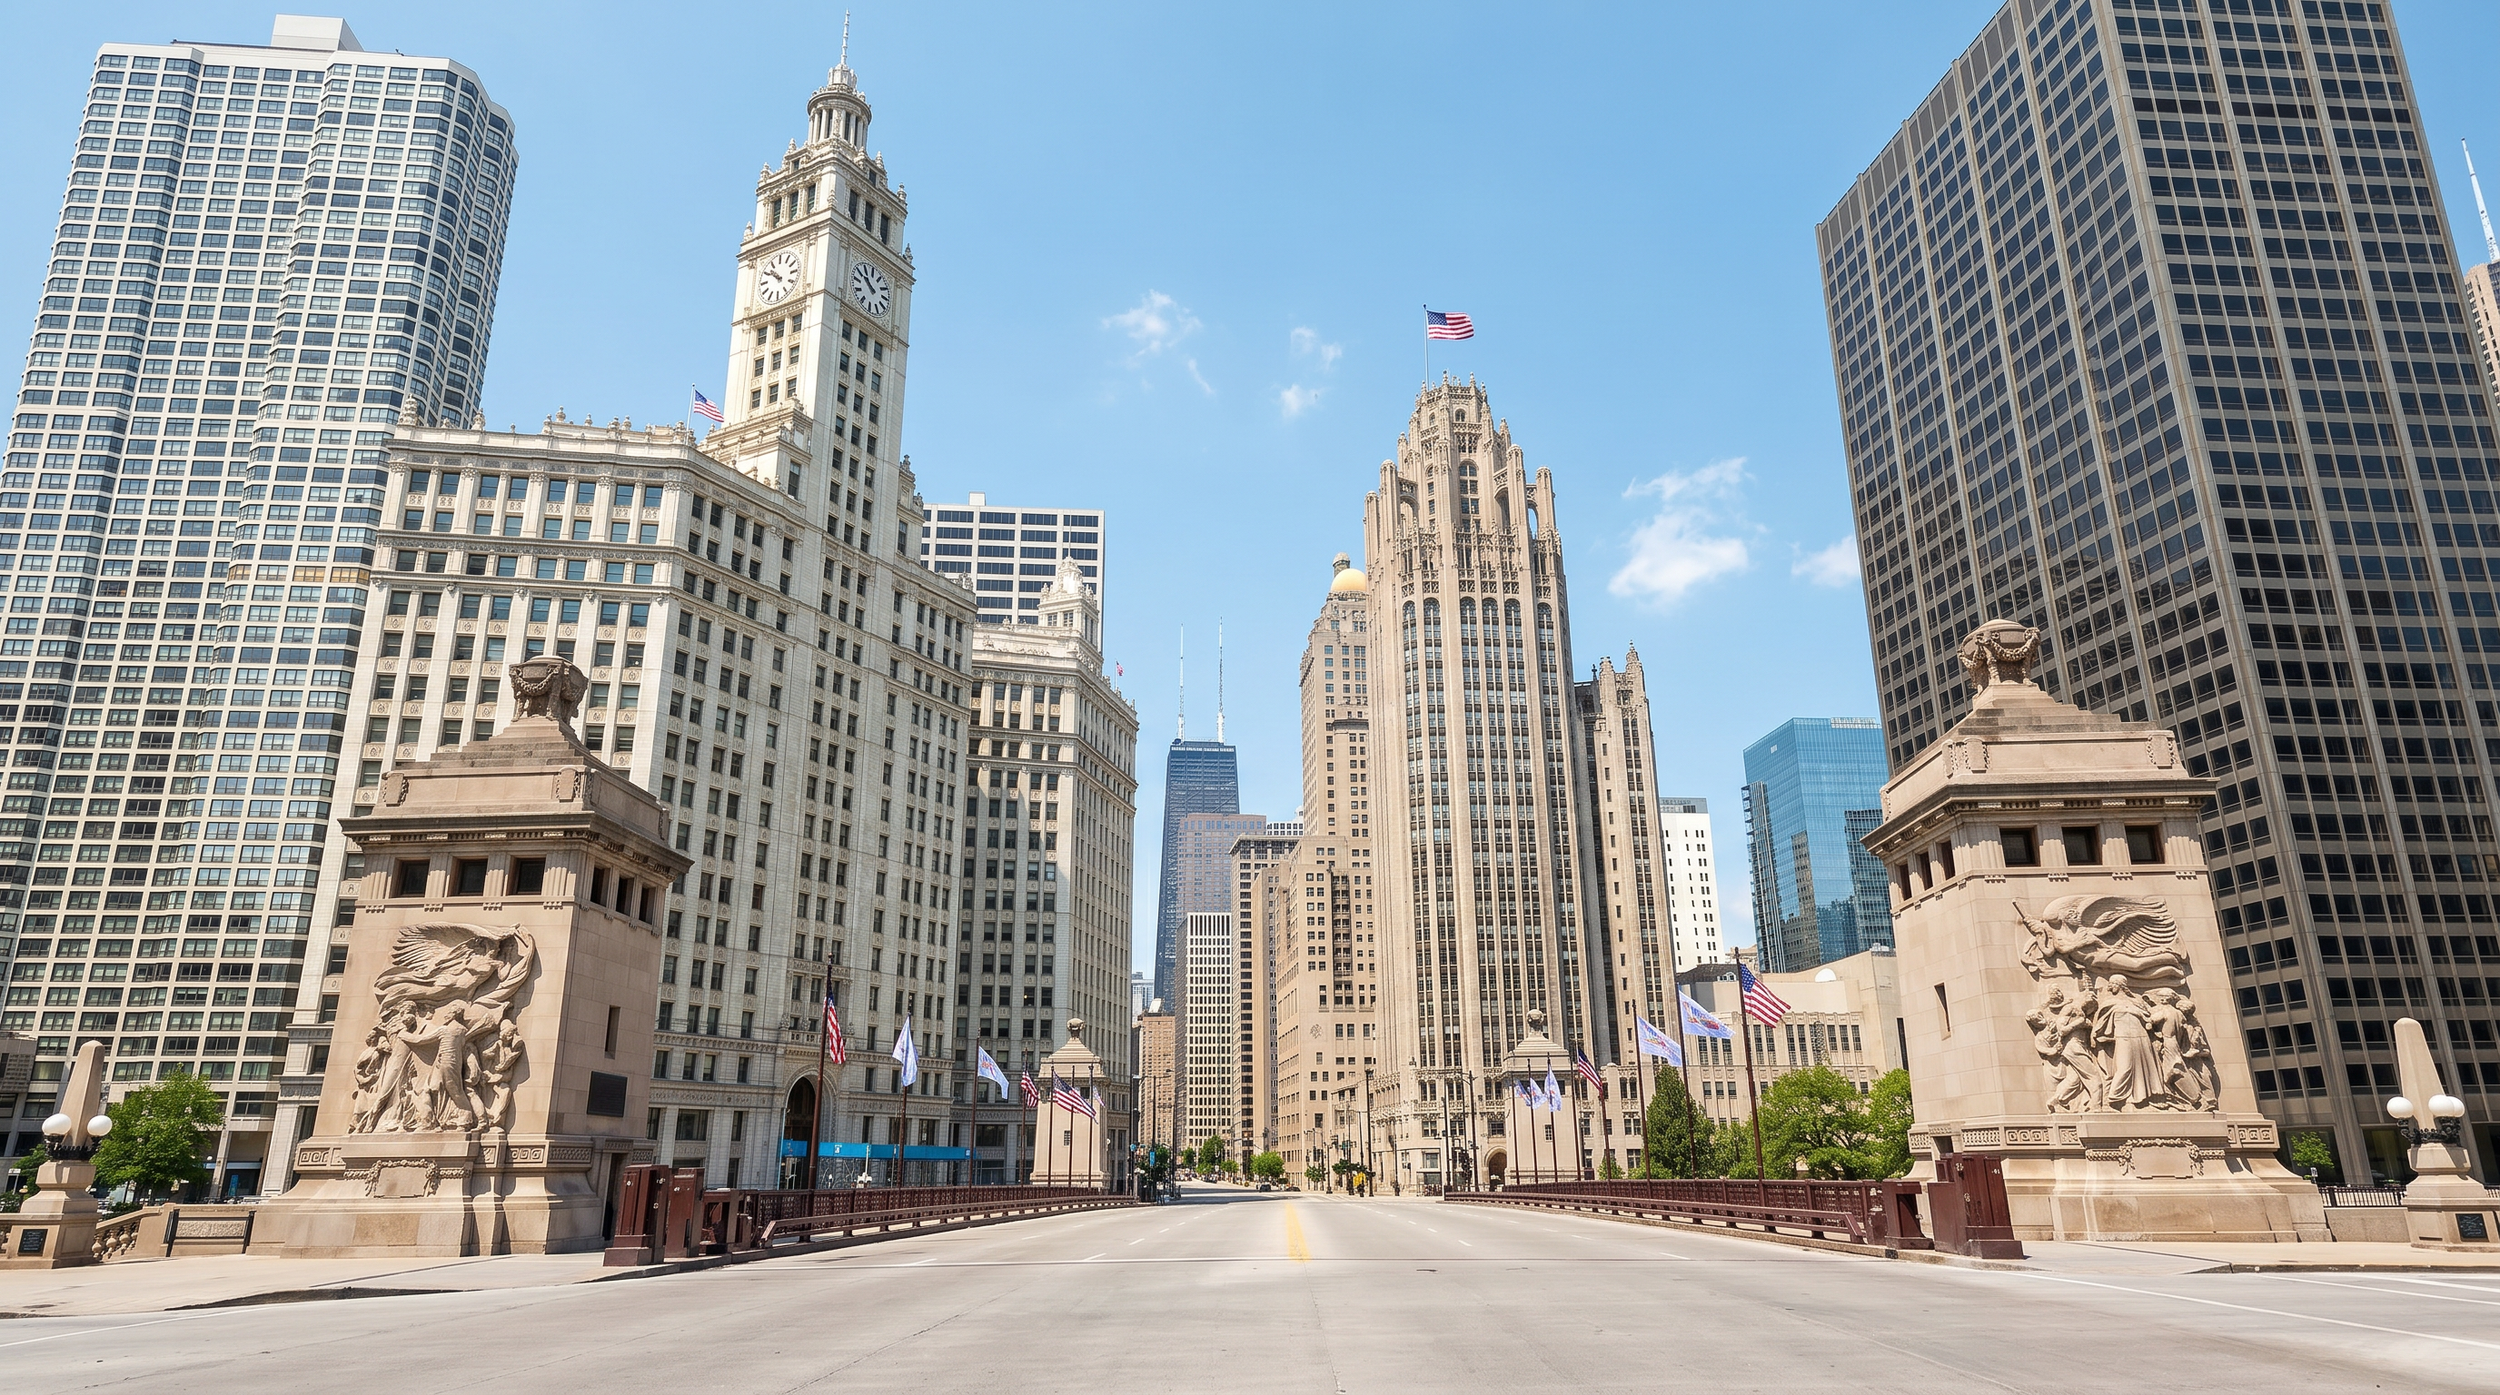
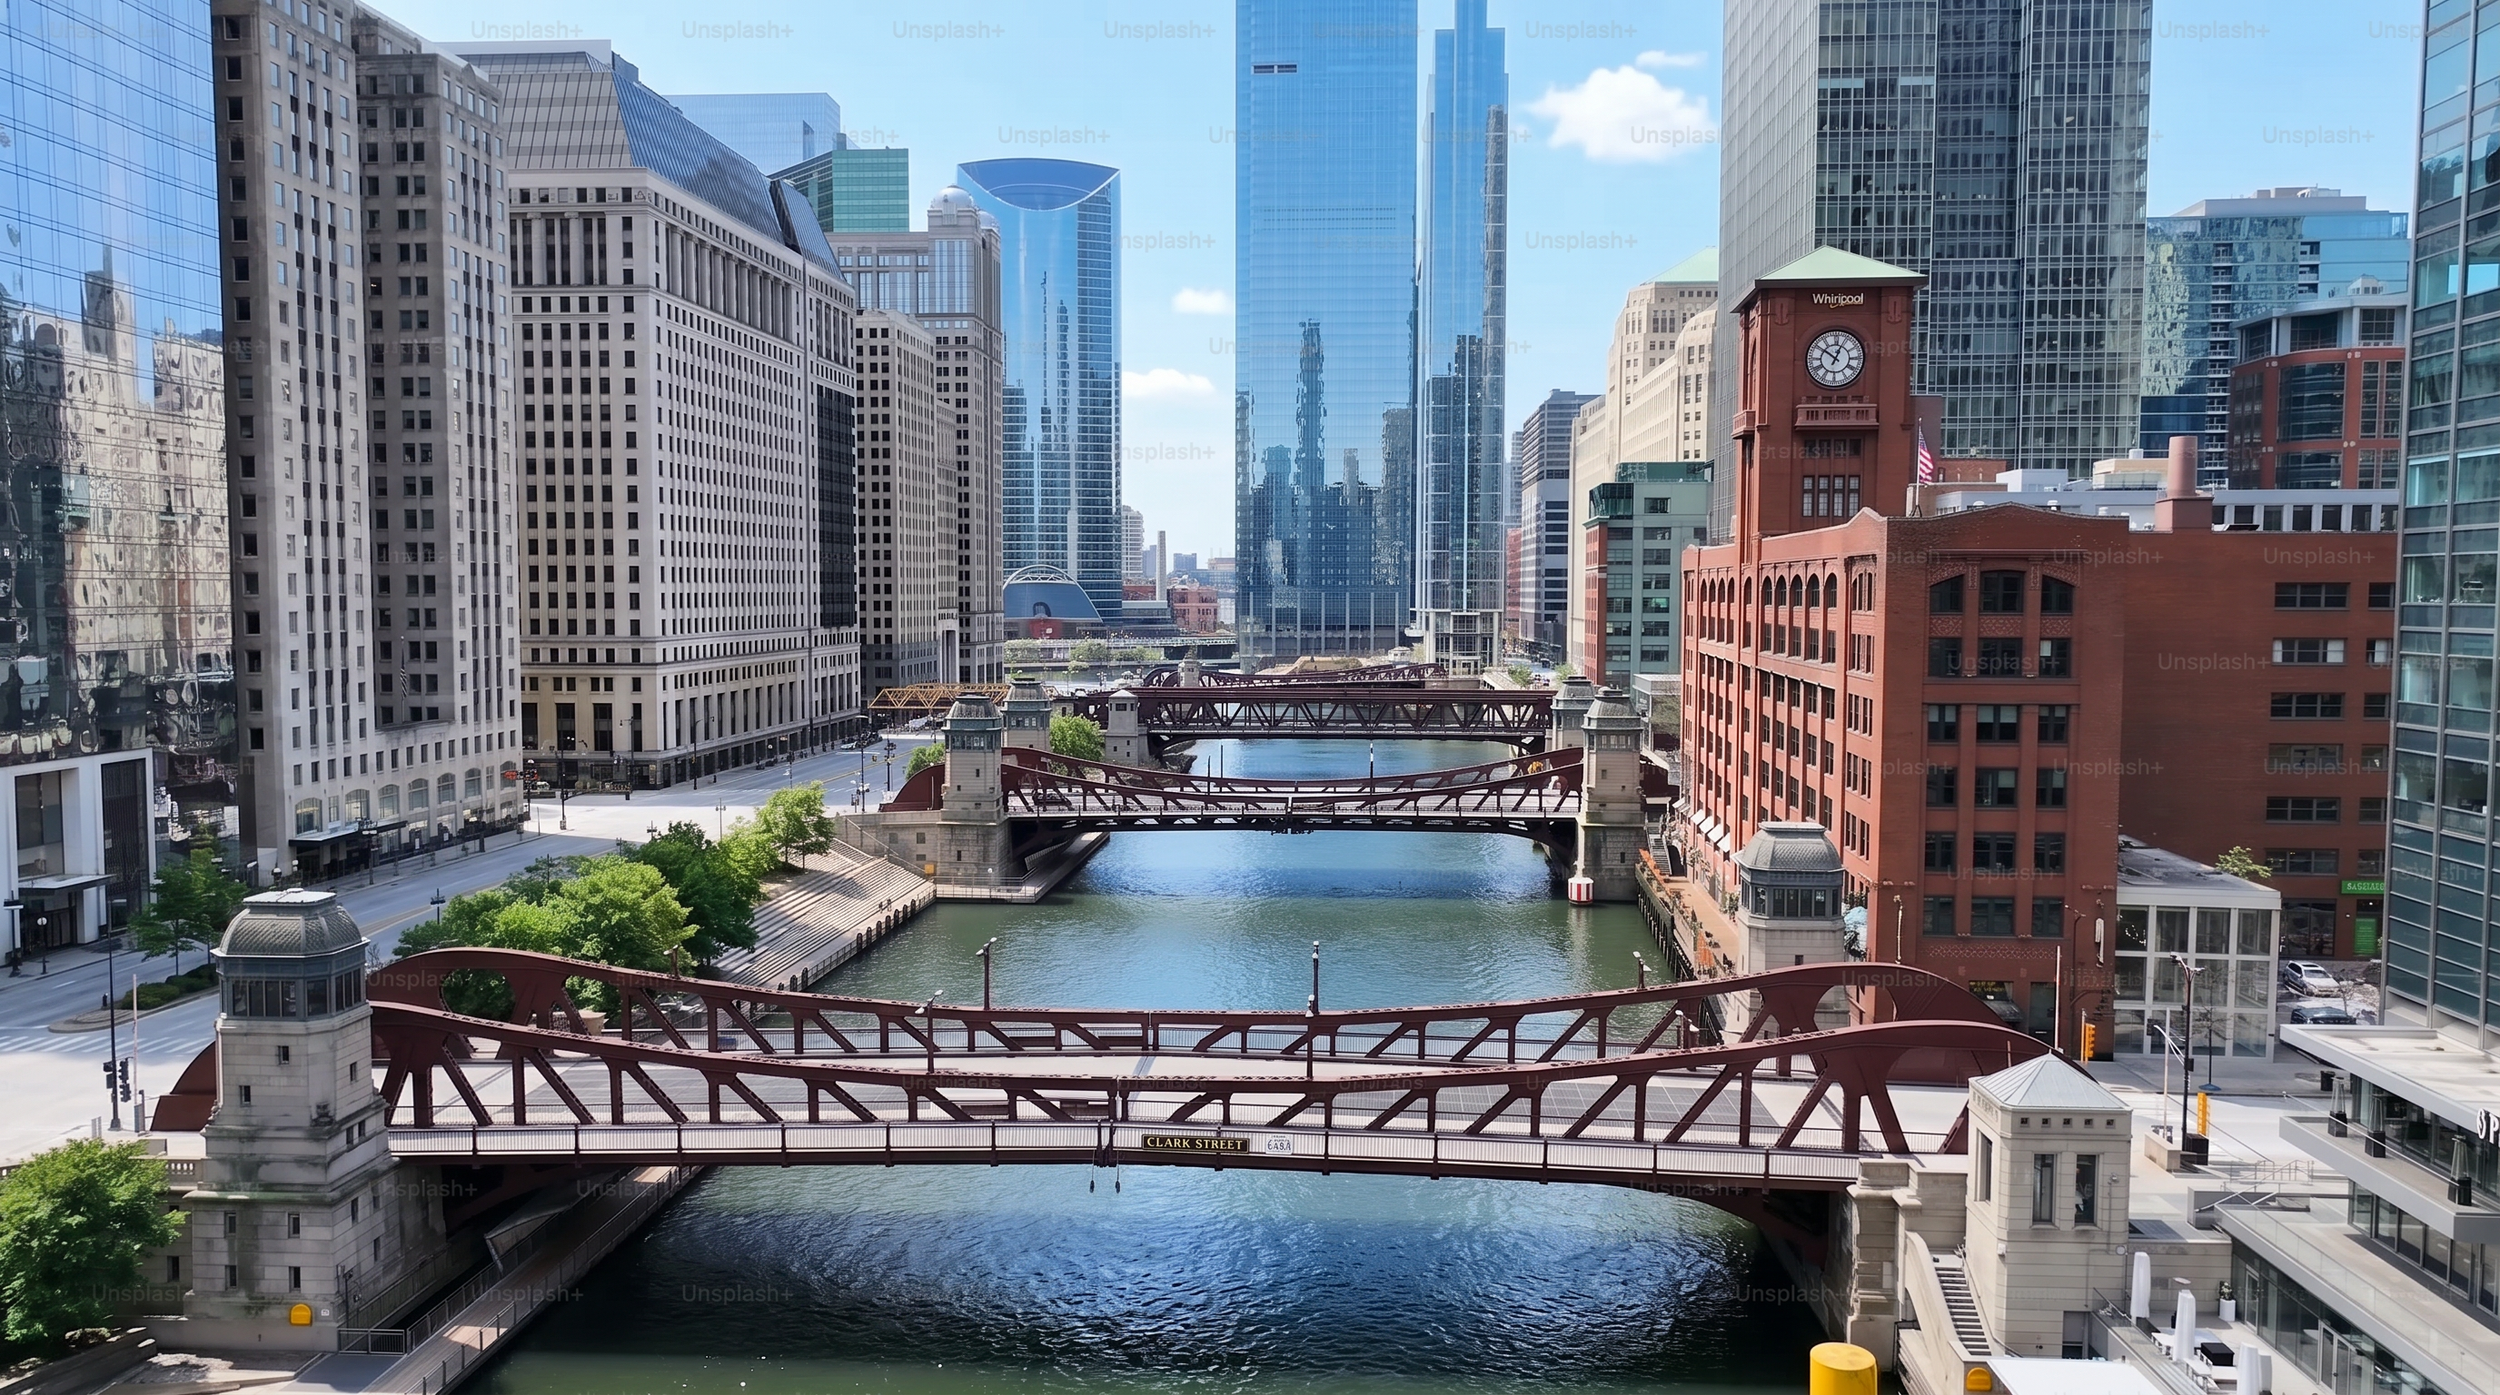
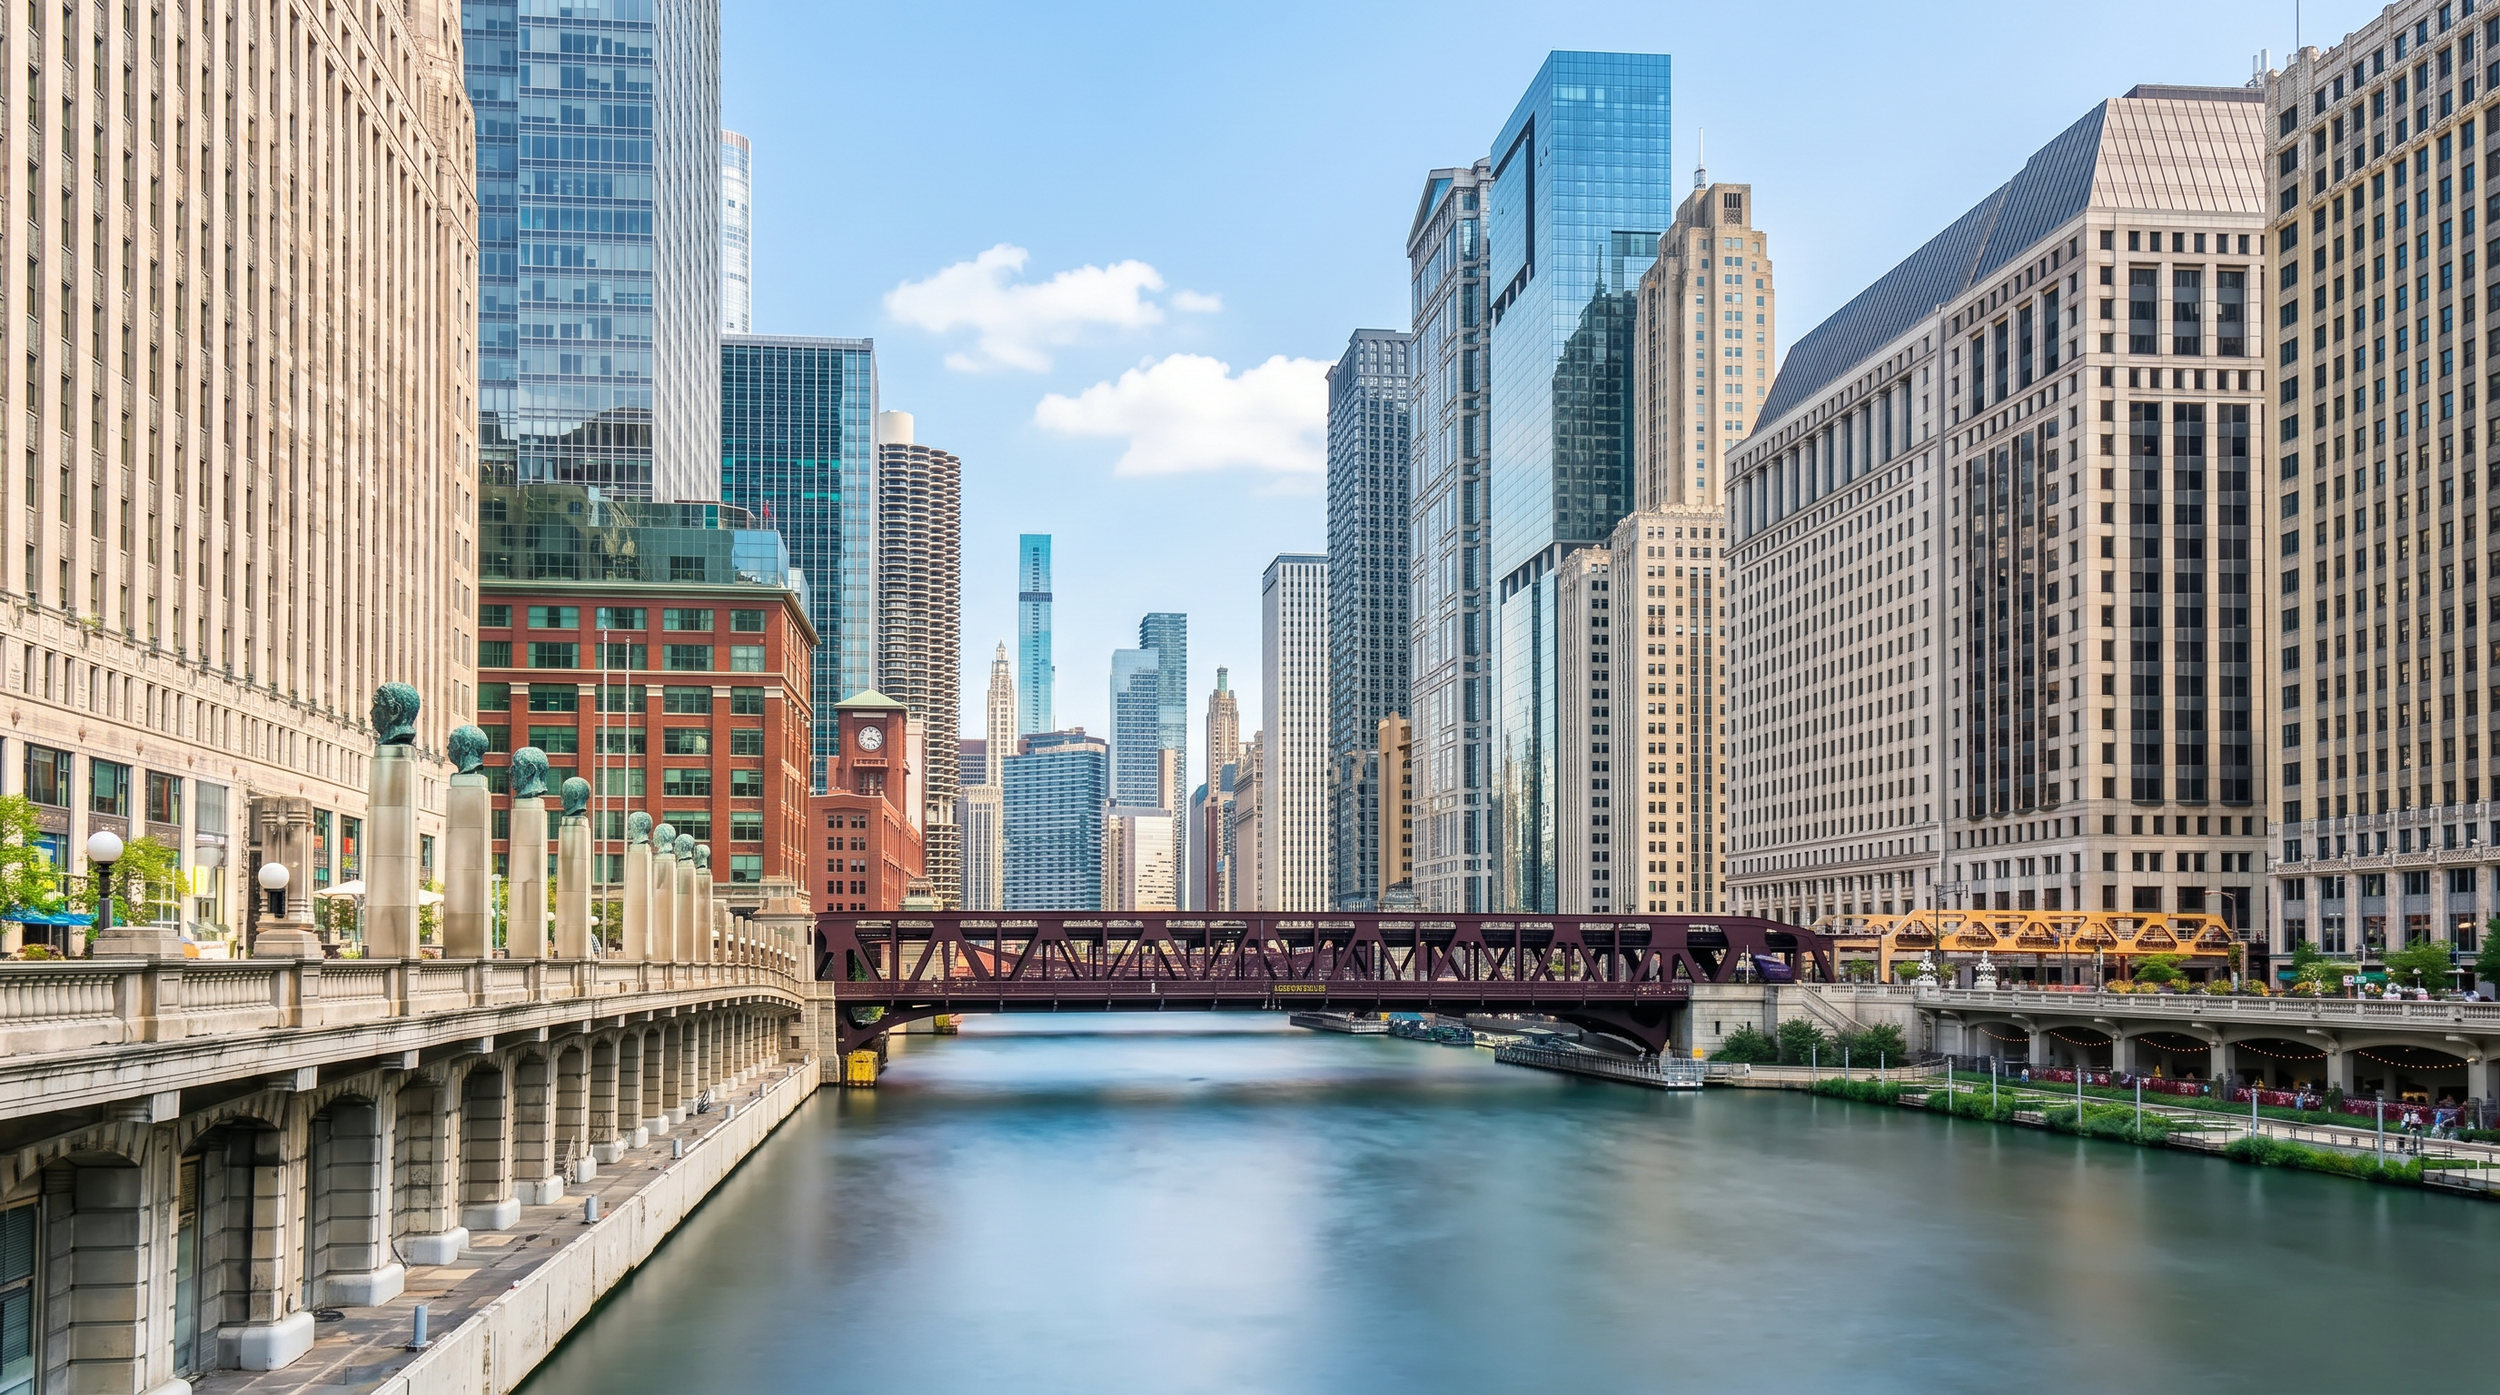
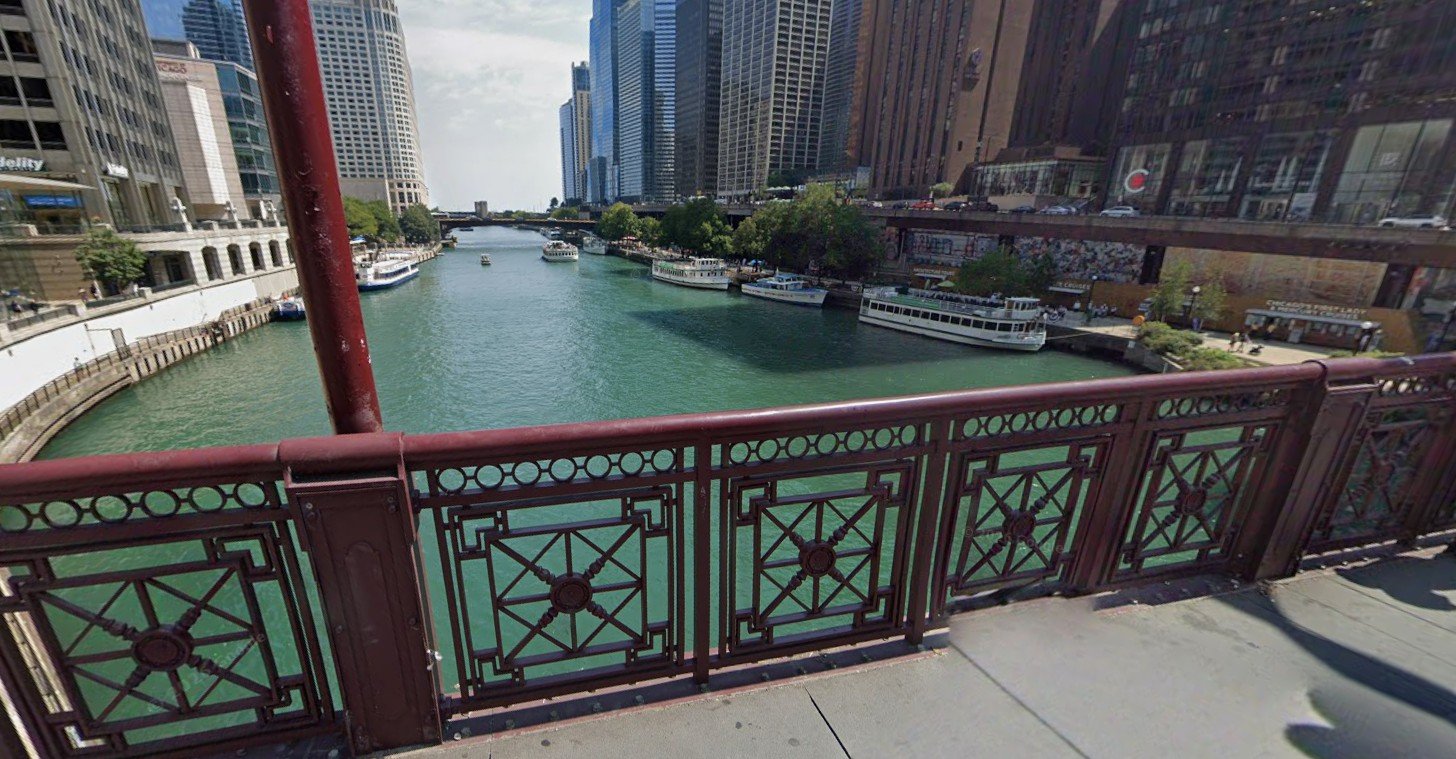
Environment Creation (Chicago as a 3D Backlot)
Instead of relying on purely generated environments, I used Google Earth as a base.
The approach:
Navigate to specific locations in downtown Chicago
Frame exact camera angles for each shot
Capture perspective-based images
Then in NanoBanana, I enhanced those images using:
High-end architectural photography references
Clean lighting and material refinement
The result was a workflow where I could effectively:
Place a virtual camera anywhere in the city and generate a cinematic-quality plate.
Animation & Shot Generation
All shots were generated using Seedance 2.0, with:
Character sheets as consistent references
Environment plates guiding composition
Carefully structured prompts controlling:
Camera movement
Timing
Action beats
This was less about “prompting” and more about directing—treating each shot like a VFX plate.
Upscaling & Motion Refinement
Once the sequence was assembled:
Topaz Video AI
Upscaled footage (720 → 1080)
Reduced temporal artifacts / “choppiness”
Improved motion interpolation
Nuke (Final Polish)
Color correction
Contrast shaping
Time remapping for pacing and impact
Final Thoughts
This project wasn’t about a single tool—it was about building a pipeline where each tool handled a specific role:
FLUX LoRa + ComfyUI → Identity & performance
MidJourney + NanoBanana → Design & consistency
Google Earth + NanoBanana → Real-world environments
Seedance 2.0 → Shot creation
Topaz + Nuke → Final polish
The biggest takeaway:
The quality comes from structure and consistency, not just generation.